The Unfold deployment tasks
10 Oct 2012In the previous post I explained how to install and use Unfold, the PowerShell deployment solution for .net web applications. Several times I mentioned the default unfold tasks. That’s right, Unfold comes with a set of Psake tasks that are the framework for a typical deployment flow. In this blog post, we’ll explain the different tasks and how they cooperate to perform the deployment.
Let’s start by listing all of the tasks that are available for your deployment. Simply
.\unfold.ps1 -docs
This will print out a list of all tasks that you can invoke from the command-line. The deploy task is the most important one.
It performs all necessary operations to fully deploy your application. This is an explanation of the subtasks that is it invokes.
These tasks are simply defined using psake.
So if you execute
.\unfold.ps1 deploy -to staging
Then these are the tasks that get executed.
-
setup:
The setup tasks is pretty simple. It ensures that the
$config.basePathvalue is available on the deployment target. Once it’s there we can start all kinds of other operations like updating the source code or composing a “release”.It’s also important to note that after this task has executed,
Invoke-Scriptwill automatically change the current location to the$config.basePathvalue when executing a script block. As a result all operations within anInvoke-Scriptblock can use relative paths. -
updatecode:
The purpose of updatecode is pretty obvious. It ensures that the
$config.basePathfolder contains a subfolder calledcodethat contains the latest version of your code. This code if fetched from source control, not a local copy. If the folder is already there, we perform an update to the latest version. If not, then we simply perform an initial checkout.You can configure where to get the code from using two configuration calls:
Set-Config scm git
Set-Config repository "git@github.com:your-account/your-repository.git"
Currently we support two scm’s: git and svn. We take pull requests for others.
It’s important to note that by default this fetch from source control happens on the deployment machine. So you have to make sure that your deployment machine can access source control (ssh keys, firewall restrictions, etc). This also means your code will also be built on the remote machine. If you don’t want code on the remote machine, you can force unfold to perform all tasks up to release to be executed on the local machine. To do so, add this to your deploy recipe.
Set-Config localbuild $true
Set-Config localbuildpath "c:\path\to\perform\local\build"
-
build:
Unlike Ruby or PHP projects .net projects need to be built using msbuild, there’s no way around it. By default, when there’s no specific configuration, we look for a Web Application project inside the code repository. If we find one, that’s what we build. However it is also possible to specify which projects or solution files that we need to build. To do so, simply specify a configuration variable containing a list of msbuild files to execute. Additionally, you can also specify the build configuration we need to use, but it’s not required.
Set-Config msbuild @('.\code\path\to\your\Project.csproj')
Set-Config buildConfiguration "Release"
That’s all we need to know.
-
release:
Once your code is built successfully, we can create what we call a release. A release is folder that contains the build result for a given revision. It should be an application that can run successfully. We put those under the
$config.basePathand the folder name for a typical release looks like this:20120905_1218_a6b9e4c_YourProject
It is composed of
- the date at which the release was created
- the hour of creation
- a scm revision reference, for git (as shown here) this is the revision hash
- the name of your project
This offers you a way to immediately see when a release was created, and from which point in your revision history. This can be of great help when problems are occuring in your application and you want to know from which revision the code was built.
If your build msbuild project is a Web Application Project, then we copy the build output to a folder below this called
web. If not, you’ll have to implement a release operation yourself. We’ll explain this in a future blog post.We copy it under a
webfolder, because it will allow you to also release other build artefacts under different folders. Maybe you have a set of Windows Services, or maybe you should also install a dedicated web service. If so, then these can be released next to the web output.Once this task is completed, the name of the release is available on the
$configobject as$config.releasepath.After you have executed multiple deployments, the
$config.baseFolderwill look like this.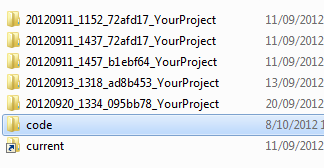
What you see are:
- Five releases, each contains a web subfolder, and possibly others
- a code folder, which contains the current scm checkout
- a current link, established by the finalize task
We keep a couple of releases around, because this allows us to very quickly rollback in case something goes wrong. When that happens, we can simply re-point IIS to one of the previous releases, and we’re all fine again.
-
releasefinalize:
this is an unfold internal task, that will finalize the work that is done in the previous step.
-
setupapppool:
As the name explains, this will create an IIS Application Pool for your application. We consider it best practice to give each application its own applcation pool. This task ensures that the application pool is setup. You can specify the name of the applicatin pool using
Set-Config apppool "yourapppool", if that’s not set, we use theiisname(which is the name of the website under IIS). If that’s not set either, we use theprojectconfiguration variable.All operations on IIS operations are performed using the WebAdministration Module
-
uninstallcurrentrelease:
If the web folder of a release contains a file called
App_Offline.html, we rename it toApp_Offline.htm. This will disable your web application until the new release is fully configured. If there is other stuff that needs to be done - like stopping Windows Services, killing an exe - than this is the place where you will hook your custom operations onto. More on this in a future post. -
setupiis:
We’re almost there. This task configures the IIS website for you, it uses the application pool we created a couple of steps ago, and creates or updates a website to point to the release we created. This task uses two configuration variables:
Set-Config iisname "www.yoursite.com"
Set-Config bindings @(
                      @{protocol="http";bindingInformation="*:80:www.yoursite.com"},
                      @{protocol="http";bindingInformation="*:80:yoursite.com"}
                     )
This IIS Name, is the name that’s used inside IIS, the bindings configuration defines the IIS bindings for your website. For more information on defining bindings, simply check the WebAdministration documentation.
-
finalize:
This task wraps it all up. It creates a link called current pointing to the latest release. That way you can quickly navigate to the currently deployed version, and it allows us to detect which version is the current one. It moves the
App_Offline.htmout of the way again, so the newly created release becomes active.Finally, it purges old releases. There is the
$config.keepoption, which by default is set to 5, and it defines the number of releases you want to keep. If you want 10, simply add this to your deploy recipe
Set-Config keep 10
Conclusion
You’ve now seen which steps Unfold performs in order to fully deploy your application. Most of them have options
which you can simply configure using Set-Config calls.
It’s important to note that this flow is completely extensible. We’ll dedicate a future blog post to how you can create custom tasks and hook them to the default flow or how you can override them. By doing so, you can perfectly tailor deployments for your own needs.